|
Updated: January 30, 2001 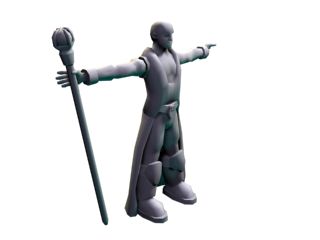
Ever saw a game skin and wondered how the engine could wrap that painting around a model? Well, UVW mapping is the process off taking your beautiful model and of crushing it into pieces so it lays flat on a 2d surface. Wonderfull isnt it? Any 2d artist can then take over and paint a texture on it. UVW mapping is what many consider to be the least-enjoyable part of creating a character model but hopefully my tutorial will make it less painfull for some. As usual, I will explain what works best for me but there are many other ways to proceed. Feel free to experiment and try different things as you start to understand how it works.
This tutorial assume that you managed to build your own model. You should also know how to create and assign different materials. Anyway, the first thing you need to do is to get your mesh togheter; delete all instances, then mirror and merge objects as needed. Once your done, apply an STL-Check and try to fix any geometry error.
I received a couple of emails about the STL-Check so to make things clearer, this is the custom "modifiers" tab I configured: 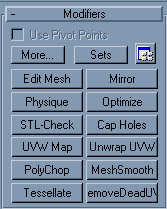 Those are the tools I use the most, you can change your modifiers tab by clicking "sets". If you don't want to change your tab, just click "More.." and you should see STL-Check somewhere in the list. I hightly recommand this set of tools to any low-poly artist though. By the way, Polychop (by Stan Melax) and RemoveDeadUV (by Peter Watje) are both exelent free plugins, download them now!
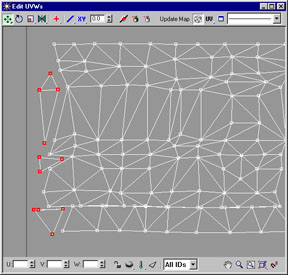
We'll start with the arms. 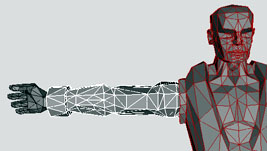 [1] Hide everything but the arm. If the arm is attached to an hand and/or torso, select those triangles and hide them as well. Edit: You don't have to hide everything but it can make your job easier. Also, don't select the 'top' and 'bottom' of the arm (where the cylinder is cap'ed) or you will end up with something messy like this. [2] Select the remaining triangles and apply "UVW mapping" [3] Pick cylindrical mapping, select the correct axis. [4] Go in "subobject" mode and rotate the gizmo until the green line is in the less visible area ("under" the arm is good for this character, use your imagination to hide theseams): 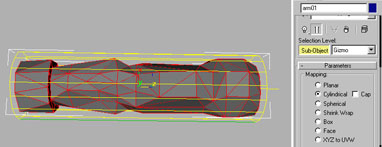 [5] Unwrap the UVW, you should see something similar to this: 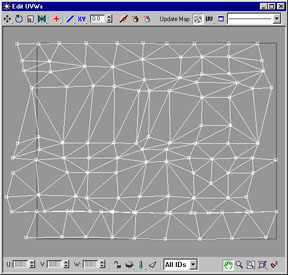 [6] Notice how the left and right borders are ugly? Apply a 'gradient' material to the object to quickly nail those triangles. Select them: 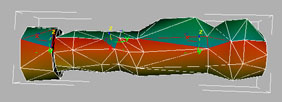 [7] Unwrap the UVW again, move those triangles out of the square.
 [8] Select all triangles, re-edit UVW, move the previous triangles to the opposite side and merge the vertices. They should fit perfectly.
 [9] Oops, it seems that one of the last row is completely squeezed. Lets pull those vertices down. 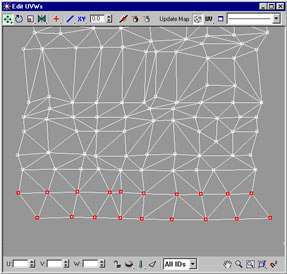 Edit: Your mapping probably won't look so nicely rectangular if you're working with less polygons.
I'm glad you asked, because even if the mapping looks ok, how do we know if a 2d artist could pull off something nice with it? Again, its not hard. Apply a checker texture on your mesh and you should see something like this:
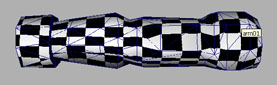 EW!! Thats right, those rectangles are supposed to be squares, plus they are all out of shape. The first thing to do is to select all vertices and to resize them until the rectangles become roughtly squares:
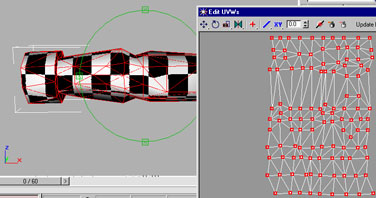 Much better! As you can see, it only takes a couple of minutes to have a nice-looking mapping... but we are perfectionnists aren't we? :) So you'll have to tweak the vertices individually to eliminate most of the distortion. You can also edit the checker texture to add precision, just keep in mind that you can't remove all of the distortion. Now do I have to explain how to map the legs? Just select one of them and redo the arm tutorial. Once you're done, mirror the leg/arm you mapped to have the other. Edit: If the leg (or the arm) is bent, map it with 2 different UVW cylinders and then weld the maps togheter in "edit UVW". Otherwise, you'll spend 2 hours trying to remove the distortion and believe me I know what I'm talking about :)
|
